Picture Frame Sizes: Match the Print, Mat, and Frame
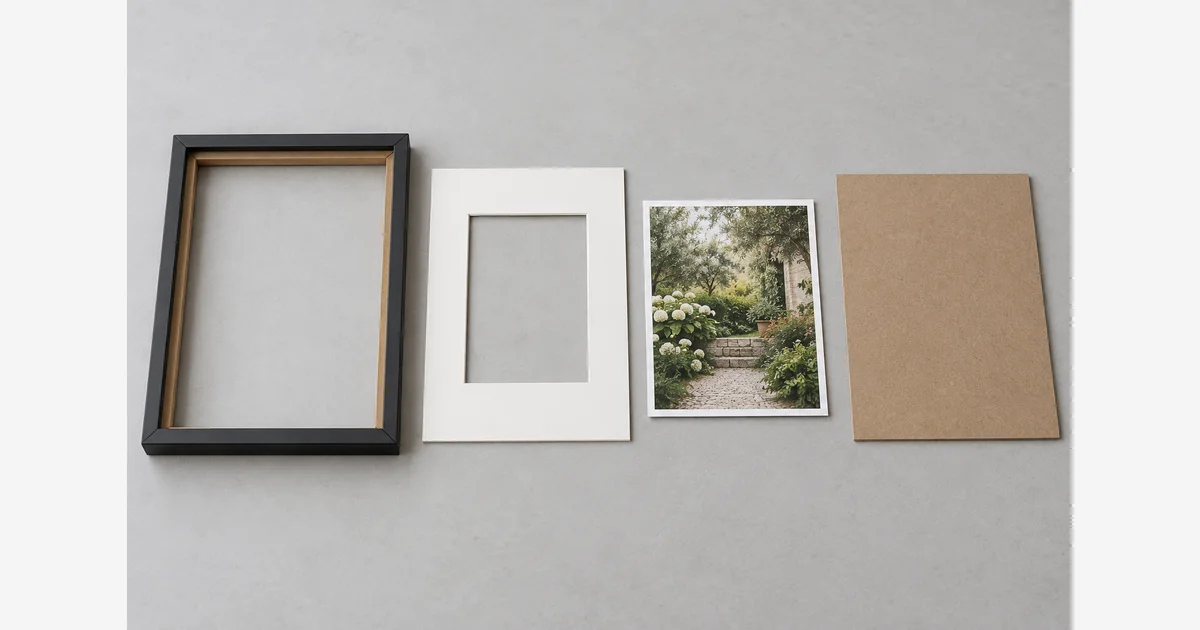
Picture frame sizes usually describe the nominal size that fits inside the frame, not the outside edge of its molding. An 8 × 10-inch frame can hold an 8 × 10 print without a mat, or a smaller print behind a mat whose outside dimensions fit the frame.
Before ordering, check three separate measurements: the frame's fitting size, the mat's actual window opening, and the paper size of your photo. If you want a particular part of the image visible, also check whether the frame lip or mat covers it. The product listing and physical measurements take priority over a size label.
The measurements that matter
The opening image separates the frame, window mat, photo, and backing board. It shows how a photo can be smaller than the whole mat but larger than its window.
| Measurement | What it means | Use it to check |
|---|---|---|
| Nominal frame fitting size | The labeled paper or mat size the frame is intended to receive | Whether your print or mat outside dimensions belong in that frame |
| Frame outside dimensions | The full width and height including molding | Wall space, shelf clearance, or spacing between frames |
| Mat outside dimensions | The full sheet surrounding the window | Whether the mat fits the frame's recess |
| Actual mat window | The cut opening through which the photo is visible | How much image is revealed and how much paper is covered |
| Photo paper size | The whole physical sheet, including any printed white border | Whether the sheet fits and overlaps the window |
The visible opening at the front of a frame can be smaller than its fitting size because of the retaining lip. Mat windows may also be slightly smaller than the photo size advertised on the package. For example, Artelo explicitly distinguishes its listed mat sizes from the slightly smaller cut openings. Ask for the actual opening when an edge-to-edge detail must remain visible.
Common picture frame and mat combinations
Without a mat, start with a frame labeled for your paper size. With a mat, the mat's outside dimensions must match the frame, while the window must be suitable for the smaller photo. The combinations below are examples offered in Artelo's published size table, not a universal specification for every frame brand.
| Photo size | Frame without a mat | Example frame with a mat |
|---|---|---|
| 4 × 6 | 4 × 6 | 5 × 7, with a mat for a 4 × 6 photo |
| 5 × 7 | 5 × 7 | 8 × 10, with a mat for a 5 × 7 photo |
| 8 × 10 | 8 × 10 | 11 × 14, with a mat for an 8 × 10 photo |
| 11 × 14 | 11 × 14 | 16 × 20, with a mat for an 11 × 14 photo |
| 16 × 20 | 16 × 20 | 18 × 24, with a mat for a 16 × 20 photo |
These are different routes to displaying a photo, not interchangeable shopping labels. A frame that says “8 × 10 with mat” may be an 8 × 10 frame fitted for a smaller photo; another listing may mean a larger frame with an 8 × 10 photo opening. Read the full description.
Check a frame, photo, and mat window
Enter measured dimensions, all in the same units and orientation. The checker assumes a centered rectangular window, a mat whose outside dimensions match the nominal frame fitting size, and a photo centered behind it. It checks basic geometry, not the frame's depth, manufacturing tolerances, or mounting method.
The default opening of 7.75 × 9.75 inches is an illustrative measurement chosen for the example. It is not a recommended opening for every 8 × 10 photo. If your photo has a printed white border, some of the overlap may cover that border rather than the image itself.
Measure before buying a new frame or mat
Starting with an existing frame
- Place the frame safely on a protected surface. Follow its instructions for opening the back; stop if the glazing or frame is damaged.
- Measure the backing or mat outside dimensions as a first indication of fitting size. Confirm against the usable recess rather than the decorative front edge.
- Measure the visible mat opening separately. Do not measure only the outside of the mat and assume that is the photo size.
- Check depth: the glazing, mat, photo, backing, and retaining hardware must fit together. Width and height alone do not establish this.
- Before ordering a print, check which part of the image will remain visible.
Starting with a photo file
Choose the paper size and crop first. A 3:2 image naturally matches 4 × 6 or 8 × 12; an 8 × 10 print has a different shape. Use the photo print sizes chart and crop calculator to inspect that difference. Then select the frame and mat for the physical print you will actually receive.
A border on the paper, a crop in the print file, and a mat over the print can each hide a different part of the composition. Keep important faces, signatures, and dates out of the area that will be covered.
Protect a meaningful original
For a unique family photograph, consider displaying a good copy and storing the original appropriately. The National Archives recommends copies as the best protection against display-light damage. Its framing guidance also calls for appropriate mat materials and a window mat or spacers so glazing does not touch the original.
A product described as “acid-free” still deserves a closer specification check when it will house an important photograph. Look for relevant preservation information, including the Photographic Activity Test where appropriate, rather than relying only on a decorative finish or a marketing label. Do not attach an irreplaceable original with household glue or self-adhesive tape.
If you need a display copy, first digitize the original with a careful batch workflow and keep the resulting files backed up. A fragile, stuck, flaking, or valuable original is a reason to consult a photograph conservator before reframing it yourself.
For an irreplaceable print you will keep out of the frame, the old-photo storage checklist covers location, housings, and support.
A short frame-order checklist
Use the measurements above when comparing picture frame options. If a listing supplies a mat, confirm which smaller photo it is intended to display.
For instant photographs, check the mini, SQUARE, and WIDE format table and Polaroid vs Instax print comparison. Use the whole sheet for fitting, rather than only its image area.
Sources
Frequently Asked Questions
-
Without a mat, start with a frame intended to fit an 8 × 10-inch print. With a mat, an 11 × 14 frame with a mat intended for an 8 × 10 photo is one available combination. Confirm the actual window and the frame’s fitting dimensions.
-
A conventional window mat usually overlaps the photo’s edges, so its actual cut opening is smaller than the paper. The amount varies. Check the real opening, printed image area, and intended mounting method rather than assuming a universal allowance.
-
The frame lip or mat may cover part of the print. A white border printed onto the paper can also affect what remains visible. Check all three before printing a file with important details close to its edges.
-
It checks centered rectangular dimensions and photo overlap. It cannot measure the actual recess, tolerances, glazing, backing thickness, or mounting hardware. Check those physical details with the manufacturer or framer.