Product Photography Lighting Setup: A One-Light, Four-Frame Trial
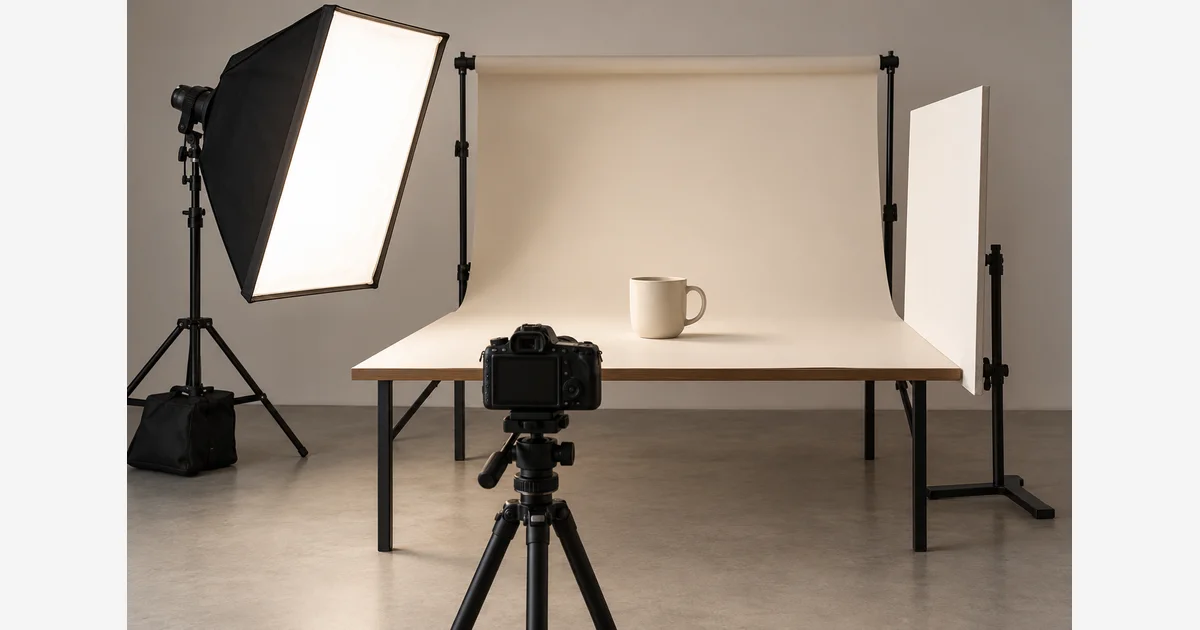
Start with one large diffused source to one side of a stationary product, then use a reflector to adjust the opposite shadow. Keep the camera and product fixed while moving one lighting control at a time. This makes the setup easier to understand and repeat than switching on several lights at once.
The goal is readable shape, material, color, and important detail. A matte mug, a glossy bottle, and a metal watch will respond differently. The setup below is a starting experiment for small opaque products, not a universal recipe for every surface.
Place the camera, product, and one source first
- Prepare the object. Remove ordinary dust and fingerprints in a way appropriate to its material. Style and orient it so the important face or label is visible.
- Choose a clean background. A paper sweep can remove the tabletop/wall corner from view. Leave space behind the product when you need control over its shadow.
- Fix the camera position. Choose viewpoint and framing before adjusting reflections. Use stable support and deliberate focus for a stationary subject.
- Place a diffused source to one side and somewhat above. About 45° to the camera axis can be a starting position, not a required measured angle. Keep clearance and support within manufacturer instructions.
- Set an intentional exposure and white balance. With continuous light, inspect the live effect; with flash, use supported trigger and synchronization settings and make a test capture.
- Inspect the unfilled shadow. Add a white reflector on the opposite side only if it needs opening. Move it before adding another powered light.
Adobe emphasizes controlled lighting and a clean environment for product work.
Use a four-frame lighting trial
| Frame | Change | Inspect |
|---|---|---|
| A: baseline | One source, no reflector. | Shape, shadow edge, and important label/detail. |
| B: fill | Add a white reflector at a recorded position. | Shadow readability and whether the object becomes too flat. |
| C: source position | Return to a known fill state, then move the source. | Highlight location, surface texture, and background shadow. |
| D: refinement | Change one useful control: fill distance, flag, or diffusion. | Whether the specific problem improved without creating another. |
Maintain comparable product brightness and record any exposure or power changes. Keep camera, product, and framing fixed unless viewpoint itself is the variable.
Let the surface choose the refinement
Matte surfaces: use shadow transitions to show form. If everything is evenly bright, move or reduce fill to recover shape. If important texture disappears, change the light direction and inspect at the output size.
Glossy surfaces: the reflected source and surrounding room become part of the appearance. Move the source, diffusion, or camera deliberately to place that reflection. A larger diffusion surface can give a broader highlight, but “no reflection” is not always desirable.
Glass, clear objects, and polished metal: expect a more specialized reflection or edge-lighting problem. Start by inspecting what the object reflects and what defines its edges; simply increasing front-light power can wash out the information you need. The basic opaque-product recipe may not be sufficient.
Strongly colored products: use a suitable neutral reference and a controlled editing display. A neutral card cannot guarantee that every pigment is reproduced accurately under every lamp.
Record the setup for a matched series
Mark the camera, product, light, reflector, and background positions. Save a setup photograph, exposure, focus method, light mode/power, modifier, and reference frame. For a new object, confirm that its height, gloss, or shape has not introduced a different highlight or shadow.
Check the final crop, label readability, dust, edge clipping, and color in the exported file. Keep product edges and useful highlight detail while adjusting a white background; avoid clipping the object merely to make the surroundings white.
If the photographs are for a marketplace, check that marketplace's current image requirements for the category and image role. Amazon's product-photo guidance is one official starting point; a pleasing lighting setup alone does not establish listing compliance.
Download the four-frame trial and repeatability record (.txt)
Use the space plan when supports do not fit, modifier comparison when spill is the issue, and blur diagnosis when detail is soft. Compare softboxes only after identifying the needed size, mount, and control.
Sources
Frequently Asked Questions
-
A large diffused source to one side and somewhat above is a useful starting experiment for small opaque products. Around 45 degrees can be a starting position, not a universal prescription.
-
Try a white reflector first. Its position can open the opposite shadow without adding another powered source or changing the main highlight.
-
Glossy surfaces reflect their surroundings, including the source. Move the source, diffusion, or camera to shape the reflection rather than only increasing power.
-
No. Glass, clear objects, polished metal, large items, and strict output requirements may need different reflection control or specialized lighting.