How to Digitize Old Photos: A Careful Home Workflow
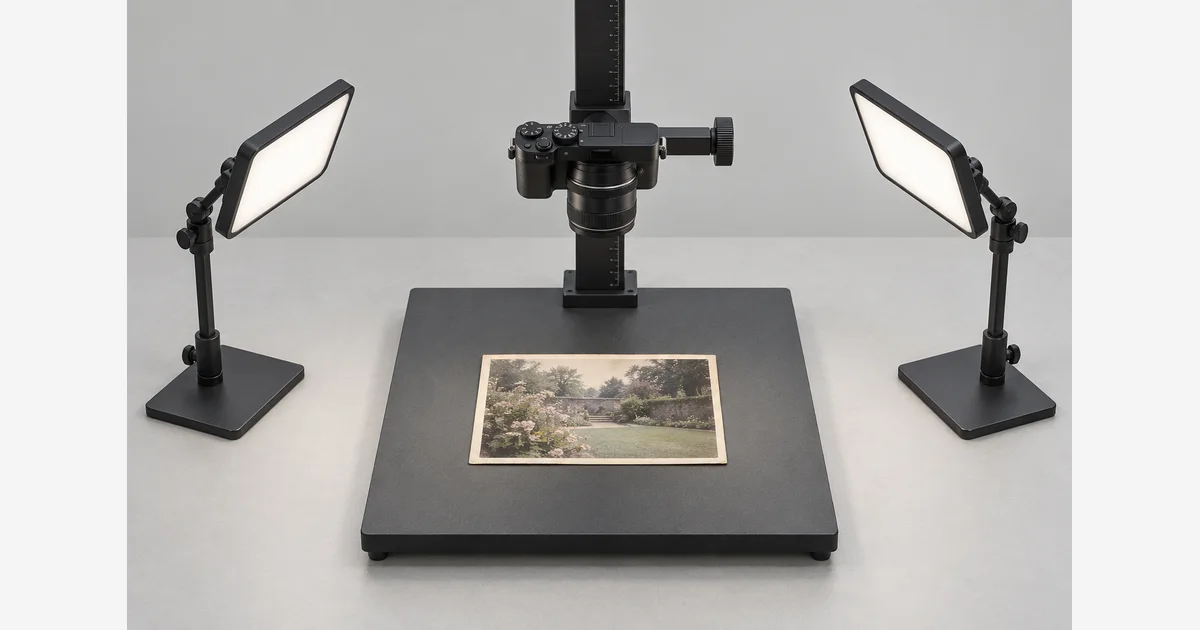
To digitize old photos, start with a small batch of loose, undamaged prints. Scan them on a flatbed or photograph them with the camera held square above the print. Keep an untouched master file, record who and what is pictured, then make separate copies for editing and sharing.
The condition of the original matters more than how fast you can scan it. A photograph stuck to an album page, flaking at the surface, or showing mold needs a different approach. Do not peel it free, flatten it under a scanner lid, or try a household cleaner. The National Archives' handling guidance explains when to stop and consult a photograph conservator.
Choose how to digitize old photos
| Method | A useful choice for | Check before starting |
|---|---|---|
| Flatbed scanner | Loose prints that fit fully on the glass and can lie down without pressure | The lid must not crush an oversized, curled, or mounted original. |
| Camera on a copy stand | Loose prints; album pages that can be supported at a safe opening angle | Keep the camera parallel to the area being copied. Do not force an album flat. |
| Phone on a stable support | A first capture of ordinary prints when you do not have a scanner | Look for reflections, perspective distortion, and missing edges. Keep the full-resolution capture. |
| Digitizing service | A large collection or originals that need equipment you do not own | Ask how items are handled, which files you receive, and whether originals and their order are returned. |
A sheet-fed scanner can be convenient for some ordinary prints, but do not assume it is suitable for every photograph. Check the model's supported originals. The National Archives cautions against automatic feeders for fragile, bent, weak, or valuable material.
If you are choosing equipment for loose prints, our flatbed photo scanner comparison is a place to check scan area, connectivity, and supported formats. Match those features to the originals you can safely handle.
1. Prepare a small batch and keep its context
Choose ten or twenty ordinary prints for a pilot batch. A small batch lets you discover a bad setting before repeating it hundreds of times. Keep each album, envelope, or event together rather than combining everything into one pile.
- Work on a clean, dry surface away from food and drinks.
- Handle prints by their edges or existing protective housings. Clean nitrile gloves can help prevent fingerprints; make sure they do not make the print harder to hold safely.
- Record the envelope or album reference before moving a photograph. Capture any useful writing on the back as a second file.
- Clean the scanner glass according to its manual, before placing an original on it. Never spray a cleaner onto a photograph.
For a dusty or fragile original, stop before experimenting. Even brushing can damage a vulnerable surface. The Library of Congress recommends cautious handling and avoiding adhesives and household marking methods; its guidance is a better starting point than a generic “clean your old photos” shortcut.
2. Scan or photograph each print
With a flatbed scanner
- Check the manual for the correct orientation and placement. Position the whole print within the usable scanning area.
- Preview the scan. Include the full image and, when useful for your record, its border. Check whether automatic cropping has cut off an edge.
- Choose the capture resolution for the detail and output you need. Keep automatic restoration or aggressive sharpening out of the only master copy.
- Scan one item, open the saved file, and inspect it before committing the whole batch.
With a camera or phone
For a loose print, a copy stand works well. Keep the camera's image plane parallel to the print, support the camera securely, and place light sources on opposite sides. Move the lights until reflections are out of the camera's view. A bright lamp directly above glossy paper can leave a reflection that hides detail.
Fill the frame without clipping the original. Turn off decorative filters and check focus at the center and edges. If opposite edges are different lengths in the capture, the camera may not be square to the print. An album needs its own supports and a comfortable opening angle, not the flat loose-print arrangement.
3. Match resolution to the intended output
For paper prints, a practical way to choose a setting is to work backward from the new print size. Scanner software usually labels its setting “dpi”; the captured image's pixel dimensions tell you what you actually have. Doubling the print's width and height at the same output pixel density requires twice the capture density in each direction. Epson gives this same enlargement example in its scanning guidance.
| Capture setting | Resulting pixels | Output at 300 ppi |
|---|---|---|
| 300 dpi | 1,200 × 1,800 | 4 × 6 inches |
| 600 dpi | 2,400 × 3,600 | 8 × 12 inches |
| 1,200 dpi | 4,800 × 7,200 | 16 × 24 inches, by pixel count alone |
More pixels do not guarantee more real detail. An out-of-focus original, the scanner's optical limits, or an interpolated setting can limit the result. Try a detailed area at two settings and compare at the same viewing scale. These examples apply to paper prints, not tiny film negatives. For output calculations and cropping, use the photo print size calculator.
For a larger collection or a planned enlargement, the scanning resolution planner helps compare capture density, cropping, and pixel-data size. Once the batch is complete, use the old-photo storage guide to choose suitable housings.
4. Keep a master, then check the batch
When your capture software supports it, a TIFF master with no lossy compression is a useful choice for files you will revisit. Make JPEG copies for routine sharing. The Library of Congress scanning guide describes this master-and-working-copy approach. If your only capture is a good-quality JPEG, keep that original file rather than repeatedly resaving it; converting it to TIFF later does not recreate missing detail.
For each pilot batch, check the saved files rather than only the scanner preview:
- Open every file in the pilot batch and verify that it is readable.
- Zoom in on a face, lettering, or fine texture to judge focus.
- Check corners, glare, dust spots, color, and the reverse-side record.
- Compare the count with your original batch and make a note of any items skipped.
Use a stable identifier such as album03-001-front.tif and album03-001-back.tif. Keep a separate index with the people, location, approximate date, original location, and filename. Write “date unknown” rather than inventing a year. Do not rely on the new file's creation date to remember when the photograph was taken.
5. Back up the files and keep the originals
Create a second verified copy before returning the batch to storage. Then follow a plan for an additional copy away from the same home or computer. Our photo backup guide includes a copy inventory and a restore check.
Digitizing makes a photograph easier to use, but the scan is not a reason to discard the original. Return prints to appropriate housings and keep them away from heat, dampness, and direct light. For a display copy, choose its size before printing and then check the frame and mat dimensions.
A checklist for your next batch
Download the photo digitizing checklist (.txt)
The checklist covers the original's condition, capture settings, file naming, quality checks, and backup. Add a batch identifier and completion date so the next person helping with the collection can continue where you stopped.
Sources
Frequently Asked Questions
-
A flatbed is a straightforward option for loose prints that fit safely on the glass. A supported camera can copy loose prints or album pages without pressing them under a scanner lid. Choose by the original’s condition, then check focus, glare, alignment, and the saved file.
-
For an uncropped 4 × 6-inch paper print, 300 dpi produces 1,200 × 1,800 pixels; 600 dpi produces 2,400 × 3,600. The second file has enough pixels for an 8 × 12-inch output at 300 ppi. It will not necessarily contain more real detail. Check the scanner’s optical capability and compare a detailed area.
-
Do not pull a photograph free if it is adhered to a page. Keep the original supported and seek a photograph conservator’s advice. A careful capture of the supported page may be an alternative, but do not force the binding or cover flat.
-
Keep the originals when possible. A digital capture can miss detail or context and can also be lost. Preserve the physical item appropriately and maintain recoverable digital copies.