How to Store Old Photos: Boxes, Albums, and Safe Materials
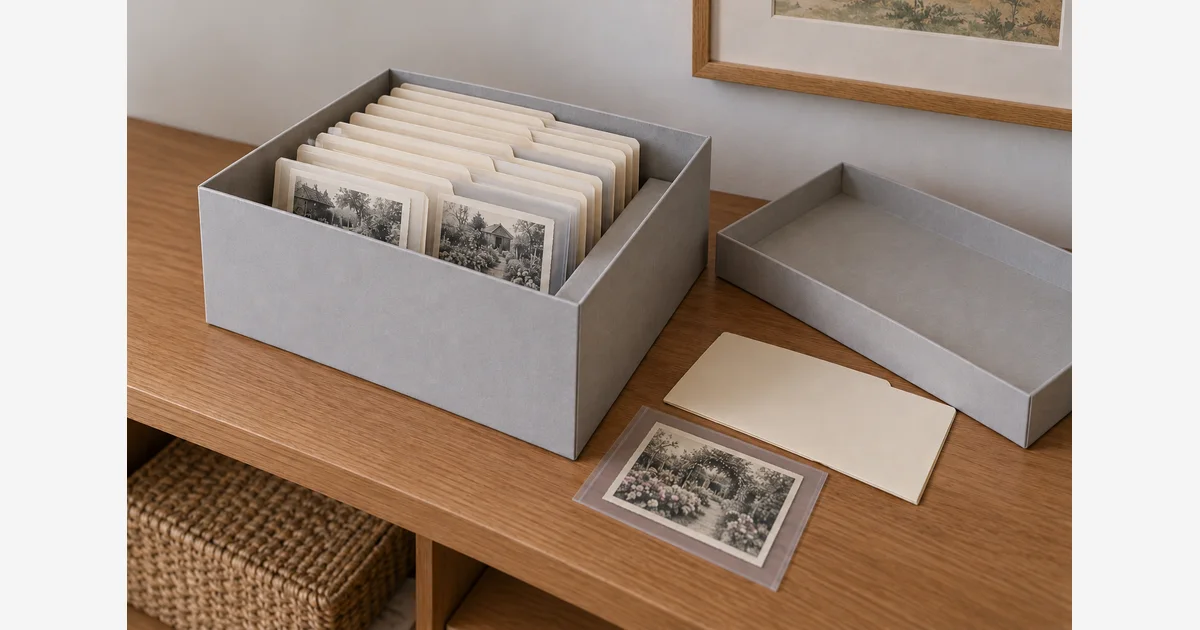
To store old photos, give each loose print suitable protection, place it in a photo-safe box or album, and keep the collection in a cool, dry, stable interior space. Choose a location away from leaks, direct light, heat sources, and the large temperature swings common in attics and garages.
Start with ordinary, undamaged paper prints. Photos stuck together, adhered to an album, flaking, or showing mold need individual advice before you move or rehouse them. A new box can improve storage, but it cannot reverse damage or make a fragile surface safe to handle.
Choose where to store old photos before buying a box
A shelf in a stable interior room is a better starting point than an attic, damp basement, garage, or spot beside a radiator. Keep the collection raised off the floor and away from pipes, watering plants, exterior-wall condensation, and anything that could leak. The National Archives' family storage guidance emphasizes the environment and correctly sized protective containers.
For general photographic storage, the Library of Congress describes a cool, stable environment, around 30–50% relative humidity and 70°F or below. Those are general reference conditions, not a complete prescription for every photographic process. Color materials and negatives have additional considerations. Do not put a mixed collection into a household refrigerator or freezer without the packaging and handling guidance that cold storage requires.
A small room temperature/humidity monitor can help you compare possible locations over time. Record the place and the readings rather than reacting to one measurement with a drastic change. Moving a box away from a known leak or heat source is often the clearest first improvement.
Check the material specification, not just “archival” on the label
Look for a supplier's statement that the enclosure is suitable for photographs and has passed the Photographic Activity Test (PAT). The Northeast Document Conservation Center explains PAT and enclosure selection. “Acid-free” describes only part of what you need to know; it does not identify every plastic, coating, adhesive, or photographic process a product suits.
| Option | Useful when | Check |
|---|---|---|
| Photo-safe paper folder or envelope | You want protection from light and an easy place to record an identifier. | PAT information, paper suitability, seams, and a size that does not bend the print. |
| Uncoated polyester, polyethylene, or polypropylene sleeve | You want to see a sound print without repeatedly removing it. | The actual plastic and photo-safe specification; suitability for the environment and material. |
| Photo-safe album pages with pockets or corners | The collection will be browsed often and its sequence matters. | Page and corner materials, fit, and whether the album closes without pressure. |
| A fitted photo-safe box | You need to protect enclosed prints or albums as a group. | Enough support to prevent slumping, without packing items tightly. |
The National Archives lists suitable inert plastics and warns against PVC and ordinary office-quality enclosures. Avoid sticky “magnetic” album pages and household tape or glue on originals. A clear sleeve is not suitable just because it looks clean.
There are exceptions. Buffered paper is not appropriate for every process; the Library of Congress identifies examples including cyanotypes and dye-transfer prints. It also warns against using plastic enclosures for nitrate or acetate negatives and in uncontrolled high-humidity conditions. If you cannot identify an unusual print or negative, keep its existing context and ask a photograph conservator before making a broad material change.
Choose a box or album by how the collection will be used
For a collection that is mostly kept rather than browsed, individual housings in a box make it straightforward to preserve an order and retrieve one item. For frequent family viewing, a suitable album or a book of display copies can reduce handling of the originals.
Our photo storage box comparison and photo album guide can help with capacity and format choices. Still verify the exact product's material specification: a convenient size or a decorative finish does not establish preservation suitability.
- Small, sound prints stored upright: keep them supported in their housings. Fill empty space with an appropriate spacer so the row does not slump.
- Oversize prints or brittle mounts: look for a supported flat arrangement that does not force them into a smaller container.
- Albums: support the whole album, close it without forcing the covers, and avoid adding more items than its binding can accommodate.
Rehouse a small batch without losing its history
- Record the starting point. Note the album, envelope, or box the prints came from. Photograph an arrangement before separating it when sequence is meaningful.
- Set aside exceptions. Do not peel stuck prints apart, remove an adhered original from its mount, flatten a curl by rolling it backward, or brush a lifting surface.
- Handle sound prints by their edges or housing. Work on a clean, dry surface with clean hands or suitable clean nitrile gloves. Do not let gloves reduce your control.
- Keep one identifier across the records. For example, record
box02-folder04-item007on the housing and in your index. Put names and uncertain dates in the index rather than writing on the image. - Check the new fit. The print should enter without rubbing or bending and be supported when the box or album is closed.
- Record the new location. Preserve useful information from an old enclosure before retiring it. A tidy box is less useful if nobody can connect its contents with the family's notes.
The Library of Congress recommends avoiding marks and adhesives on photographs and labeling housings where possible. For fragile originals, use its conservation referral guidance rather than extending this routine into treatment or repair.
Keep a short storage record
Download the old-photo storage checklist and location record (.txt)
Record the collection identifier, room and shelf, housing supplier/specification, items needing advice, and date last checked. Look again after a leak, a major room change, or a move. Do not repeatedly unpack the whole collection merely to tick a box.
For regular display, a copy lets you enjoy the image while keeping the original housed. The National Archives recommends copies to reduce display-light damage. Use our digitizing workflow, photo backup checklist, and frame measurement guide to plan that route.
Sources
Frequently Asked Questions
-
The exact material and storage conditions matter. Photo-safe uncoated polyester, polyethylene, and polypropylene are options for appropriate prints, but ordinary unknown plastic is not enough. Follow guidance for the photographic material; plastic sleeves are not suitable for every negative type or a damp, uncontrolled environment.
-
No. Acid-free describes only one characteristic. Check the enclosure material, coatings or adhesives, and the supplier’s photo-safe specification, including Photographic Activity Test information where applicable.
-
Either can be useful when materials, fit, support, and environment suit the originals. An album can help frequent viewing; a box of individual housings can help with grouped storage and indexing. Avoid sticky album pages and pressure from overfilling.
-
Do not pull an adhered photograph free or force an old album flat. Record its context and seek a photograph conservator’s advice. Capturing a supported page may be an alternative to removing the original.